
A step-by-step walkthrough for students: open the video recorder, capture your take, save it, name it, and submit it to your teacher — then read their feedback when it comes back.
1. Open the video recorder
In the EEi Music Studio, find the video icon in the play bar and click it to open the video recorder.

2. Set up camera and mic, then start
You can record straight from your browser. Pick your camera and microphone, then click the center of the recorder to begin.

3. Record yourself — click the video to stop
Play your part. When you’re done, click the video to stop the recording. Works the same for any instrument — wind, string, or percussion.


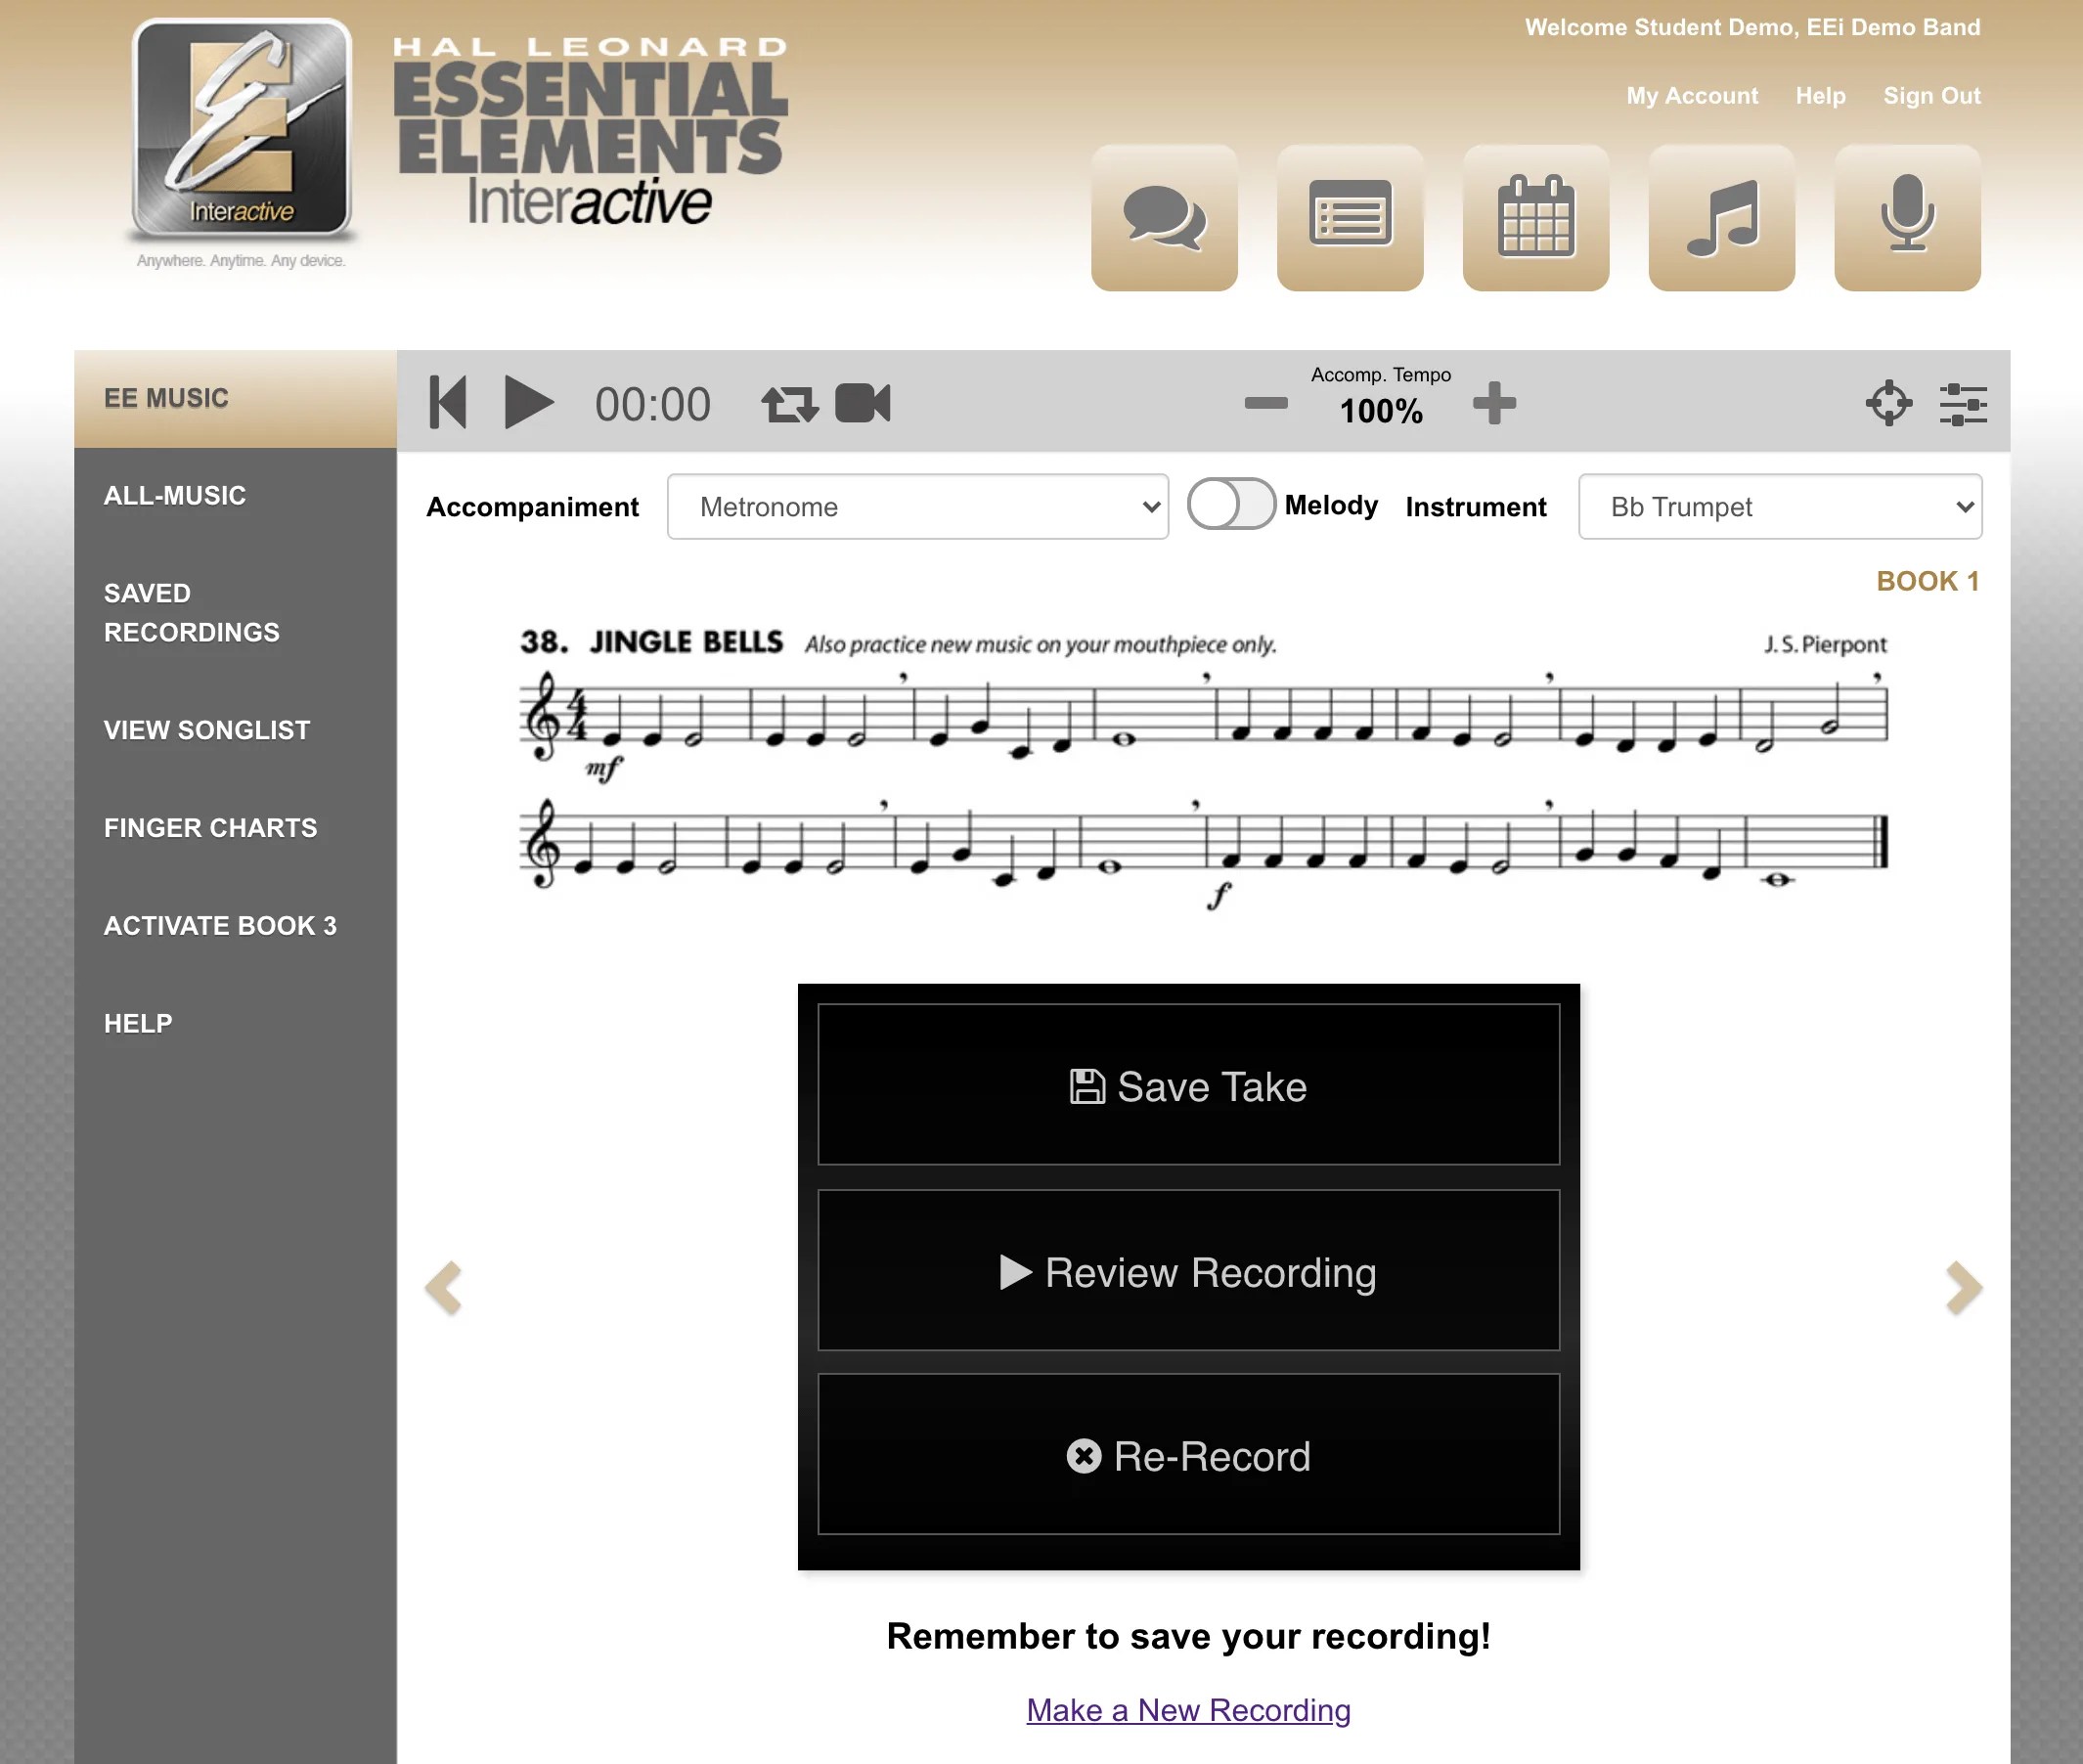
4. Save your take
After stopping, click Save Take — without saving, your teacher won’t be able to review it. You can also play the take back or re-record if you want a better one before saving.
5. Take saved
Your video is now in Saved Recordings. Nice work.

6. Rename it (optional)
Click the edit (pencil) icon to rename the take so you’ll recognize it later.


7. Replay anytime
You can replay any saved take whenever you want — really useful for tracking your progress as you practice.

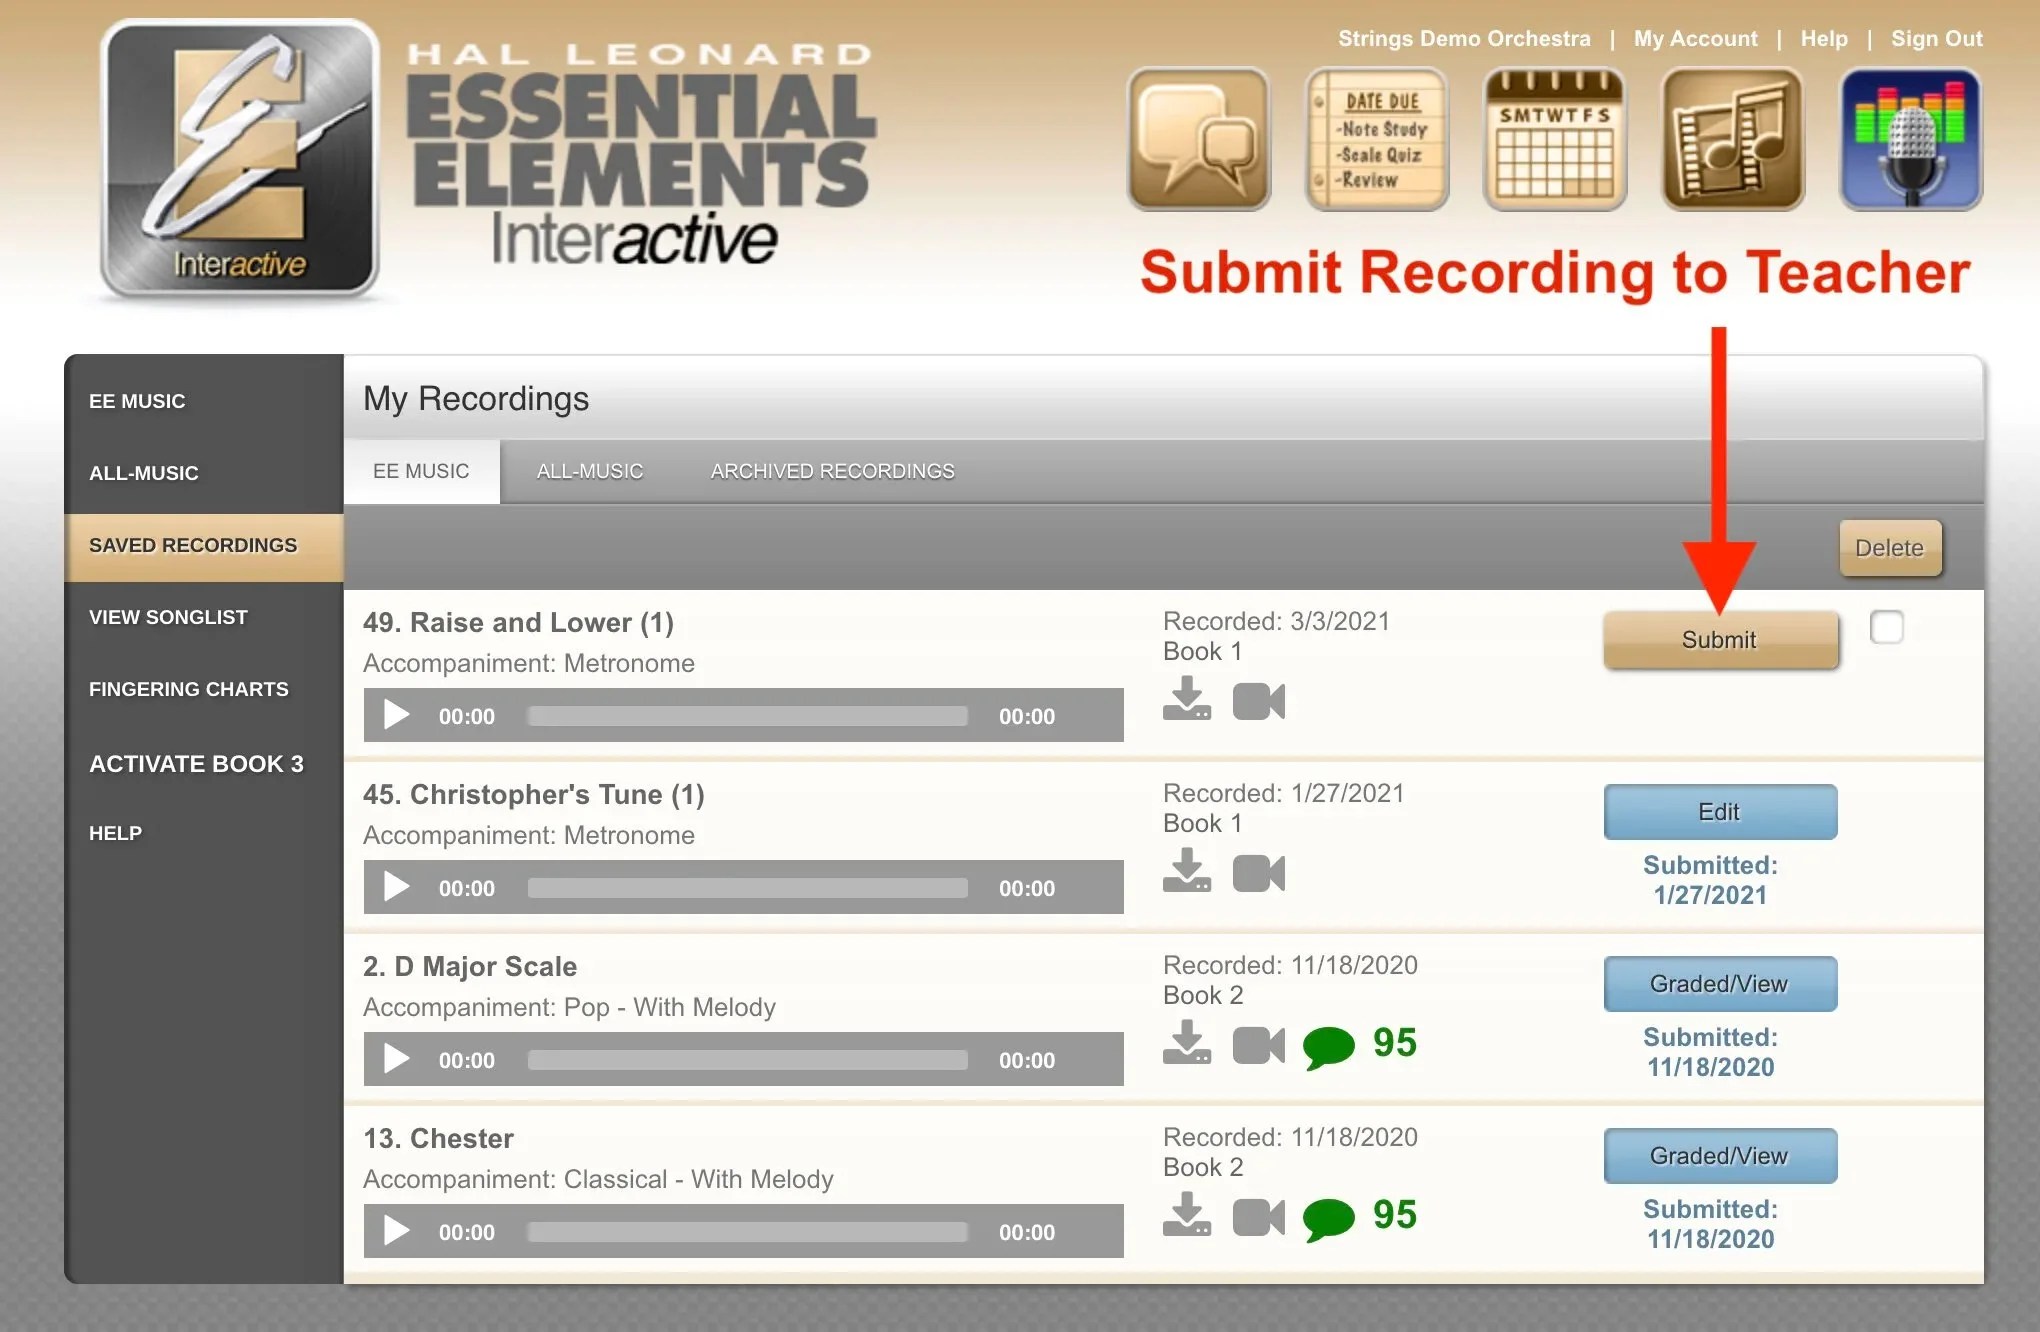
8. Submit it to your teacher
When you’re ready, click Submit to send the video to your teacher for feedback.
9. Read your teacher’s feedback
Once your teacher has reviewed your video, click the comment icon to read their feedback on your performance.

That’s it — your video is on its way to your teacher. Keep practicing!
Leave a Reply